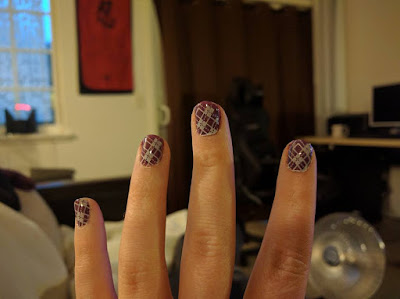
First thing first: I highly recommend OPI nail polish for all your basic needs. They go on thick and generally only need one layer. They also dry pretty darn fast! You will need a clear base coat for sure (base coats are formulated to adhere to your nail. Don't try to save money here by buying an all-in-one. The formulas are different in a base coat as opposed to a top coat.) And you can not do these stamps without a top coat because they can and will scrape off easily.
I also like Orly nail polishes, but I prefer using them on their own because they come in a lot of wacky and cool colors. Plus they are also thin so you need more than one coat in most cases.
Here are the items you will need (I will use amazon links to make it easy but you can find a lot of this stuff cheaper elsewhere):
Stamper and Scraper - Believe it or not, not all stampers and scrapers are created equal. The scraper pictured here is my favorite. A good stamper will not be too firm and not too soft. It will need to pick up the polish well and form fit to your nail.
I also highly suggest that you "prime" your stamper with a nail file because it will help pick up more polish. The color of the stamper can be important too... if you choose white and you use a lot of white stamping polish, you're going to have a horrible time lining up your stamp when you can't see it!
"Special" nail polish - You may think you can get away with using a regular thick nail polish and you'd be wrong. Trust me, I've tried. Stamping polish is much thicker. This is the brand I use (try ebay). They are small bottles, but they will last you a long time.
Manicure plates - My favorite part! There is so much to choose from it will boggle your mind. [I have read that not all stamping plates are created equal either. Some of them are made so cheaply that the recesses etched into the plates aren't deep enough and won't produce a good stamp. I have bought $2 plates off of wish.com and have been fine, but you've been warned!] I have used the round plates before, and they certainly work, but those kinds of designs are mainly little pictures of things like flowers and butterflies. They are hard to line up perfectly. I prefer nail plates that have pictures designed to fit to your entire nail. They usually give enough room for error in case your stamp is a bit off. They also have ones that depict an entire scene and you just pick the part you like and stamp it. I find those a bit odd and haven't bothered with them.
That's it for supplies! Now for the tutorial:
After your base coat dries, paint your special polish into a plate design that you like. Make sure its in there thick; don't be stingy. Scrape off the excess - and scrape it twice (this will insure all gaps are filled with polish). Now work rapidly here - the polish is thin and will dry quickly. Use your stamp and roll it onto the plate, pressing hard. It should pick up most all of the polish. Line the stamp up with your nail as best as you can, and just like on the plate, roll it onto your nail from one side to the other in one fluid move. Its best to have your nail on the table when you do this. Between each nail, you will want to wipe off your stamp and your plate with nail polish remover (please just use acetone. It works so much better for clean up. Also don't use cotton balls for this; you will regret it. Paper towels will work just fine). And that's it! The process seems long and tedious but once you get the rhythm down it'll go quick.
One downside to full nail stamps is the clean up around the edges.
I have a manicure pen for this.
One last step before it's all done: the top coat. The stamped polish is pretty much immediately dry, so after you're done stamping all your nails you can paint on the top coat - but one more piece of advice: your top coat brush will literally pull the stamp with it as you apply it. My advice is to carefully and lightly dab the top coat onto your nail. Swipe it as little as possible. Once it dries, add another top coat in the normal fashion.
All done!
There are so many options here; different stamps to try, different color combinations... the possibilities are endless and will keep you busy for a long time! Plus they look super cool, don't you think? :D


No comments:
Post a Comment